Cylindrical Vessel No. 4

This laundry drum was a long-sought possession.  I craved a barrel-type wooden vessel large enough to hold a fortnight’s tee shirts (or a month’s undergarments).  Three previous buckets were of knotty cedar, which created knotty problems to the hand plane.  Enter advice of a Massachusetts woodworker:  “Use quarter-sawn clear lumber of tight grain”.   Hmmm, makes too much sense.  Guess my Yankee was sun-stroked.

Tail-end of last winter I spied a curbed sideboard awaiting the rubbish hauler.  Figuring I could salvage a drawer or door, the item made it into my truck for dissection and reuse.  The top?  Magic.  Lumber of the tightest grain I thought may be spruce, as it resembled the Bavarian spruce of nicer centenarian violins I’ve restored.

After exhaustive research,  grad students in assistantship, hours on a Cray computer deep within NSA’s 3rd-lowest bunker, we have answers.  The top is pinus strobus.  Yep, treasured old growth eastern white pine.  You do not buy this wood at the supply yard.  By 1920, 99% of all old-growth eastern white pine had been logged out.

The right time arrived.  The sideboard top was laid out, studied for a few days, measured twice, lined out, and porch-cut on the c.1988 ∆ Delta 34-670 10″ 110 lb table saw.  Freehand crosscut into half, twice more, everything ripped to 2 7/16″. All planks had 3/32″ resawn off to remove old paint in two passes each with half-height blade for safety.  With a 10˚ bevel ripped into both edges, cylindrical Vessel No. 4 begins.

These ninths of an arc have been rabbeted to accept an inset base.  Yep, hauled the ∆ Delta to the porch for 15 minutes of 90% humidity cutting.

Gluing the 18 slats sort of corkscrewed.  Became 19+ slats in a peculiar helix design.  I’m blessed in saving the scraps from cutting 10˚ bevels on the staves, as there were three seams which wanted solid filling.  They worked, far better than a glue/sawdust putty would have.

Things got wonky.  The cylinder began moving into a helix, so the rabbeted ledge for the base had to be abandoned. I made that bottom the top and retained part of the rabbet detail in the final.

Nearly all of the wood from the sideboard top was used to make this vessel. It’s got one application of SealCoat on the exterior.  A final buff of 0000.  Another project off of the bucket list.

arts & crafts with salvaged wood

A collection of projects added as they progress.  Next up, a picture frame.   For now . . .

May 2022heartpine live edge shelf No. 1


May 2022heartpine wall panel:  The idea came to make a wall-mount bedboard.  This one is about 62″ x 23″.  The panels are all heartpine and the rails & stiles are fir.  There are bracing supports bridging most of the 27 pine slats, as the slats are not lap or finger joint.  The journey makeing this prototype was laborious but now I can make one, make a better one, and most importantly, price one of any size   🙂


May 2022 heartpine tray:   Before quarter-sawing a choice 3×4 post of 1850s longleaf pine, the worn exterior was saved for another authentic distressed tray.  Can’t fake patina like that!  Nor those splinters on the bottom.  Had to encapsulate that area in acrylic


May 2022Scrappy spruce shelf:     Constructed with the 5th of six c.1900 spruce drawer bottoms salvaged outside a U. of Penn administration building in 2018 as featured here.  This shelf was started in 2021 but with the sourcing of these fine c.1927 nickel-plated brass bath hooks, we can finally call it D.O.N.E. 🙂  More pics in the salvaged wood projects thread.


April 2022The Easter Egg Shelves:   This began as two shelves but went south.  A quickie redesign, scroll saw, inlays, overtime, electric lighting, snacks, and BYKI, way over budget. 
How it’s made:  A gorgeous piece of scrap pulled from a dumpster.  Look at that grain!  Ripped with 7″ circular saw, hand planed and scraped the smooth, nearly consistent.  Failure, success, mistakes, triumph.  A little hand-sanding to 220 and diluted spirit varnish solves all.  Don’t forget 0000 steel wool final buff both before and after the violin varnish.

The Easter Egg Shelf


March 2022Scrappy hemlock trays:   A nice hemlock joist c.1880 came my way.  Tablesaw-less, I made a few test rips with a circular saw.  The scraps eventually made it into two scrappy trays:  one for my Hatagane miniature brass bar clamps, the other as a basement stairway shelf.  The second was claimed by an aunt for her dining room table (!) in Williamsburg Virginia.  It did get a little reworking.  😉

The Hatagane Clamp Tray


The Williamsburg Tray

How it’s made: The Williamsburg Tray

reclaimed wood from old furniture

This c.1920 sideboard, assembled just 5 miles from here, was recently set to curb pending a house sale.  Beneath that paint is wood is too good for landfills.  With help from an enthusiastic octogenarian passerby – is there any other kind? – we load this treasure into my truck.  I cart it home, knock it apart,  and study possibilities.  The two drawers are deconstructed into a tidy pile.

First project, we fashion a small box for our buddy’s book store counter.  Rabbeted corners reinforced with old violin pegs.  The base rests within a dado without glue, too tight to shift.

From the sideboard even carcass wood is appreciated, the drawer runners.  Unseen, deeply grooved after years of rough duty.  We’ve saved these bits from the fireplace and begin to reclaim their beauty.

There is a bit of a learning curve.  Without an actual bench, we fashion a Moxon Vise of sorts with our kitchen table sliding end leaf, eight clamps, and an underfoot cat.  The boards are flattened; the grain appears.  While planing three boards to consistent width, they transform into quadrilaterals.  Wedge-shaped.  The table is re-rigged, boards clamped singularly, each planed to true parallelograms. The ends we square, reducing the effort to rectangles.

This interestingly aged mystery wood now appears to be poplar.  Getting the scrap down to usable stock seems the entire project, but the it’s only just started.  We take fight with tenon saw, chisels, and mallets.  After much blood, gouged palms, multiple redesigns to accommodate mistakes, a box smaller than planned is completed.  Poplar sides with dovetail corners, red pine base pegged in place.

Wow, that old poplar sands up slick.  At 320 grit, it’s mirror smooth, hard, cool.  After a few weeks, the wood should darken a little as air hits it.  Then my go-to, diluted spirit varnish.  Violin varnish, to go with the four violin pegs sunk through the sides into the base.

heart pine • boxes & trays

A summer stroll plus chance equals victory.  The dumpster of old wood and plaster alongside Curtis School of Music had that smell.  Among the refuse, a few damaged 1×6 planks.  100+ year-old pine flooring.  Bingo.  Unsuitable for union work, salvageable for the determined.  Our Arts & Crafts effort is back to breakneck speed.

Step one, reacquire a table saw.  This takes four months.  The bar is high.  While awaiting Fate I gather information on my chosen plank from other crafters.  The consensus is heart pine.  Harder than red oak, prized for its strength and color, longleaf pine was logged to endangered status by the 1920s.  I’ve not yet realized its beauty.

🎶 Amazing Grain, how sweet it is …

First project, a shelf.  Channelling tolerance of imperfection, I am happy with the outcome.  Amazing grain.  It’ll come back down for detail scraping to its underside, crisper counterbores for mounting screws, maybe hand-buffing to a gloss, but is substantially complete and will support eye glasses, a cell phone, even a healthy cat of uncertain age.

Onward to the new.  Childhood stacking blocks, only hollow.  Each crafted from six pieces of wood, sometimes more.  I call them Idea Blocks.  You toss yours out of the way, a drawer or bookshelf.  When something wants thinking, you retrieve your block and handle it as you would a Rubik’s Cube.  Admire grain, smell, lightness, tight smooth seams.  Far nicer on hands, nose, and mind.  When you stop thinking about the idea you’re looking for, it’ll pop out of thin air, out of the Block.  The Idea Block®.  It works every time, guaranteed.

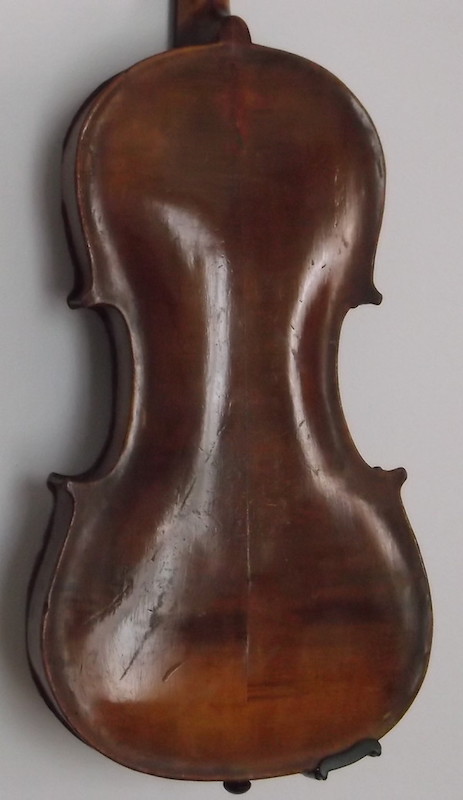
Now we’re cooking!  I take delivery of Lie-Nielsen tools and “new” c.1980 Hatagane brass bar clamps.  We admire our heart pine scraps and cut-offs.  Tray crafts begin.  I use every cut of the plank but the squeak!  “Pieces Make Music”, the sound of violins and a kitchen craft table.

Still I return to the dozen or so items, notice machining marks from initial power saw cutting.  More planing, scraping, sanding, buffing.  We want the final to appear entirely handcrafted.  I retrieve Micro-Mesh buffing sticks, 1,500 to 12,000 grit, from basement luthier stockpiles.  The wood begins to shine;  the end grain glows.

I’m inured to sawdust in my grits but Bobsled The Cat is tired of pawing pine chips out of his water.  We scale back, pack tools, take one last photo shoot.

Scooping cutoffs from the kitchen table, I wonder if our plank will yield other projects.  Of the wood, we crosscut, resaw, plane, scrape, sand, scroll, glue, clamp, pick, but rarely discard.  Mr. Willowby’s Christmas Tree, Redux.  A pen tray for the desk or drawer of a favorite someone.  Or simply for the act of being creative.  Plenty of wood.  Even for two.  Where there’s wood, there’s a way.

Wood crafts bring many pleasures.  Reclaimed longleaf pine smells wonderful after scraping.  Matching grain with a good tight glue joint is visually pleasant.  Nonstop problem-solving is better than any board game.  Each of the many learning steps makes us more complete in ways both associated with crafting and others far removed from the manual, physical side.

The hardest parts are often the most rewarding.  I’ve never been good at putting a decent edge on kitchen knives, hand planes, chisels.  Properly maintaining cabinet scrapers?  Forget it!  Always hit or miss if a good burr would form on card’s edge.  This effort was different.  Fine wispy shavings upon bench and lap, the scraped surface crisp and glowing.  Respect for talent, ability, art, tradition.  I make time to understand varying steel hardnesses and tool edging techniques. 

Good tools are a must.  After you learn how to use crappy tools.  Back to overcoming obstacles and problem-solving.  Lest you end up like the new-construction plumber who does not know how to replace a water heater.

Epilogue   I am making a pen tray, mindful of dwindling wood supplies.  Thinking five steps ahead.   Inconsistent thickness of the base is hand-planed and scraped to acceptable variance.  Even more pleasing, the side rails have also been planed and scraped to remove saw blade marks.  And most surprising for a guy who eats his meals standing at the kitchen counter, I use a jig to square edges receiving glue.  Clamping techniques are explored.  End rails [stiles, in door speak] are chosen for interesting grain.  Minor wastage;  the scraps no doubt becoming part of an even smaller shelf for friends of Mr. Willowby.


Addendum   The card scraper sharpening process:  First, two ancient estate-sale honing stones are properly cleaned – three scrubbings with 0000 steel wool and WD-40 to float out embedded metal shavings.  Emory paper is fastened to stout glass, the stones flattened in wet slurry.  Mike Staib’s article made all of the difference.  Patiently the scraper edges are squared with file in jig, then edges flattened on honing stones.  Finally, with the harder steel of my new carbide burnisher, the card edges are flattened again, forming a tiny lip which is curled back into a tiny burr.  I work with precise angle and pressure between differing hardnesses of steel.  Like fitting a violin bridge, 60 minutes of work comes down to a final 15 seconds.  But I can finally put an edge on my tools.  A skill once learned is not soon forgotten.  Even better, I’ve acquired new knowledge and skills to share.


salvaged wood projects

Covid-Sequestration has nudged the masses back to kitchen-table basics. Hobbies, crafts, improvements, renovations.  Here, a few local efforts:

The spruce came from c.1910 drawer bottoms salvaged from a U. of Penn administration building renovation;  the cedar from a 1940s wardrobe, cracked, fallen, and unusable.  Amazing what can get done with a little hammering, prying, ripping, planing, glueing, and sanding.


How it is made: Cylindrical Vessel No. 1


How it is made: Cylindrical Vessels Nos. 2 & 3


How it is made: Cedar cabinet reclaimed from cedar wardrobe (April 2021)


BONUS:  How it is done:  Bedroom refurbishment  (February 2021)


How it is made: Slat shelf


How it is made: Spruce scrap into scrappy tray (2022)


February 2022 – Mantle shelf No. 2:   Mini table with complementary earring tray.  The little box weighs less than a USD 25¢ piece!  Fashioned from the c.1910 drawer bottom dregs salvaged from a U. of Penn administration building renovation.


How it is made:  Spruce side shelf   –  

Completed December 2021, this shelf sat in the rafters, waiting the right hooks.  They never arrived, I tried a couple of Lee Valley chrome hooks.  Not period-correct.  Eventually two c.1927 nickel-plated brass bath hooks are robbed from other locations to complete this shelf.

Sébastien Kloz

Sébastien Kloz An 1700

Round I  –  The old fiddle arrives and promptly falls apart as soon as I remove the chinrest.  Good to know.  I now have another ‘trick’ to keeping a fiddle together 🙂   First guesses place this ‘violin’ as French c. 1850-1870.

Note:  This violin is not a Kloz, nor a Kloz copy.  It is not remotely like a Kloz.

Round II – We are making progress.  The second guesses trickle in.  The bottom is grooved to accept the ribs, a school of construction which went out of fashion in the early 1800s;  this would push our violin to the early 19th century.

There was some damage at the top’s seam.  We get it together and add cleats.  Keeping in mind I’m not painting the Sistine Chapel, varnish is applied but we do not try to hide our work.  Not resurrecting the dead, merely an old trade instrument.  The back is glued to the ribs – on the second try, which is a good thing;  it means I had the sense and patience to disassemble and clean up the first try.

Round III – This violin will get a new end block at the neck.  Some maple cello rib material is delivered for shimming.  Perfect to raise the neck heel but it is promptly ruined as we add an angle to the 2.5mm veneer.  The second try, we got it right.  Keep thy chisels sharp.  Another milestone, our first mortised end block.  We learn eleven ways not to make a mortised end block.  It worked on the 12th, though.  The right spruce at the start would have been helpful but would I have learned so much?

We’re buttoning up the ribs and will soon modify the top’s neck mortise, as the neck heel is now unavoidably leaning further towards the body.  The price one pays for correct overstand and projected fingerboard height.

Round IV  –  What a learning curve.  We set the neck at 9˚ but end up with a projected bridge height of 40mm.  Back apart again.  Two degrees less, figured out via this taper and angle calculator.

The other bit of trivia?  Violin necks to not attach through dovetail connections, which is what I made.  Strong as a tree, but  mortise and tenon connection is the correct one.  No matter, the violin takes medium tension strings wonderfully, despite her 150+ year old age.

The pics are out of order.  The top came off once because of misalignment, then came off again to reset the neck.  It looks like quite a muddle. We also swapped pegs twice and made a two bridges.  Sound posts?  Maybe three.  Lots of activity. At the end of the day we once again celebrate Pieces Make Music.

*SOLD* to Colin of Philadelphia, wearing a 4-month old set of D’Addario Kaplan Vivo strings.

The “Delipped ¾”

Here’s an interesting one.  This came to me in its ancient 1930s case, the violin top semi-detached.  What made me leave it in the basement for two years was a piece missing from the top.  But last winter my work table became clear. Rather than save the fiddle for my heirs to throw into the fireplace, I thought I’d give it a shot.

I’d already started working on it before the pics began.  Here the top is off, cracks are repaired, and I’m cleating the cracks.  The rib of the body has been leveled of glue and pieces of the top which stuck to it.

So the top is almost whole. But there is a chunk of the lip missing  😮   (not the saddle notch).  The lip cracked along the purfling channel groove.  The top is perforated in places.  A luthier had a few too many schnapps for lunch, came back, and went to work on this top with a 4/4 purfling channel cutter?  Who knows.  The perforations we fill with glue but the chomp remains; a bit more nibbling is in order.

I find a piece of old spruce with a tight grain.  I made a poor choice with discoloration in the wood but it is covered by a chin rest, as ye shall see.

So it is now hide glue time.  Yum!  I add sifted Appalachian spruce collected from under my table saw.  To cover any shortcomings in my carving.

The patch is in a tricky spot to clamp.  So I wedge the top into a nearby shelf.

The top is reattached. The sound post, saddle, and endpin are installed as well.  The third set of pegs are perfect.  The instrument tone-taps a clean, resonant “F”.

A new ebony fingerboard is installed and planed a little thinner (it could have been thinner still, but I still do not have the right hand plane).  Then a scoop, a concavity along its length, is scraped into the fingerboard.  Under the steel E string, I can make the fingerboard flat (in fact, I do make it flat).  And progress from flat to concave as I move towards the lowest string, which is a wound G.  In addition to the scoop, there is, naturally, a radius to the fingerboard.

Realizing the patch seam may develop a dark line from the pigmented spirit varnish, I cheat a little, extending the purfling groove through the patch, and puddle a bit of varnish into it. Next time, I may use an actual purfling channel cutter.

In the progression of lip images you can see how I tightened the radius, changed the contour, and kept reapplying varnish of differing tint.  In a trick of grain, varnish, and lighting, a integral area of the top adjacent to the patch looks like the patch, and vise-versa.

As my second larger patch job, I have learned to leave it plenty proud;  the finish will never come out right the first few times, and you want something to sand down.  I could have kept at it, but the area is covered by the chin rest, it’s structurally what I wanted, and pursuit of perfection always ends in disaster.

So that’s it.  The fiddle came through surgery with an A+.  It has a deep mature tone, reflective of its 80- or 90-some years.  This violin is destined for a performing arts high school student in Wilmington Delaware.

The work is a collection of 5-minutes-here and 5-minutes-there.  Sometimes a bedtime visit to check the doors and make a cup of tea turns into 90 minutes of quiet progress.  You want a table where everything can be spread out – and remain untouched – for the duration of the project, even if it is two months long.

Aside from the occasional midnight whittling or sound-post fitting, most of the work and photography is done in the mid-morning under natural indirect light.

Later 1800s American Violin

This fiddle came in a package deal from a collector in Simsbury Connecticut.  It was so badly damaged and abused I nearly hung it on the wall for permanent collection of dust.  Here are the chronological images over ten weeks.  As you can see, it was a lot of “back to the table” for this old survivor  …  more text to follow this decade.

click image to open full size in a new window

This violin was a “trade” instrument bought by someone who played in theater pits and gazebos and taverns. Before radio, live music was the standard. And this violin was played until it was falling apart! At some point she was roughly pressed into left-handed action, its pegs rudely swapped into different holes. A proficient yet indifferent repair in the ’20s may have blunted the tone, as we shall see . . .

Here you can see we’ve bushed the peg holes and are touching up the peg box.

We think it is done . . . but it is not.  The tone?  Regrettable.  I’m advised to sand her to wood and practice lacquering.  But I have an idea.  See how shiny it is in these two following images?

Back for round three. Improve the pegs, nut, fingerboard, action. Possibly the sound post and bridge. But the real dirt? In removing impacted dirt from the finish, I discover someone brushed a clear spirit lacquer over the whole thing, probably during repairs in the 1920s. So I aggressively remove this layer of finish, to get down to the original varnish of the late 1800s.

Voilà! Back to a natural look. Like my favorite jeans. The tone? You’re transported to an 1890s music hall. An 1880s tavern. Back when a person could play for their bread and beans, 50 hours a week.

This gem of Americana is in the instrument collection of a prominent rebuilder of guitars. We are flattered to be so included!

1950s “Hillendale ½”

A couple of weeks ago I passed a garage sale. The best kind. Made an offer on two student violins in unplayable condition. A ½ size and a ¼ size. Got the call back and picked them up last week.

I tightened up the old strings on the larger of the violins, liked its tone, so started with that one. Fit a new peg, straightened out the bridge – maybe, and cleaned up the entire fiddle with naphtha, then a Behlen polishing agent.

Turns out, after cleaning off the funk, that the ½ has real purfling, the ebony strips of wood inlaid around the perimeter. Also the two-piece back covers the heel of the neck; there is not a separate heel cap; a good sign.

Looks like we have a special violin here. As Steve Fields says, the better the student, the better the violin they should have when young. Some lucky kid will end up with this violin at a decent price.

The D’Addario Helicores arrived from Johnson Strings Friday, and Saturday afternoon was the perfect rainy day to string a violin and perform final shaping to the bridge. Despite my finest efforts to ruin yet another bridge, everything came out as close to perfect as I dare. This violin, unplayed since the ’70s, is back in fine fiddle. Clear tone, fast action, and LOUD.


Lastly, 1/16″ cork was used to restore the original ebony chin rest.  And a wipe of linseed oil to complete the refurbishment. 

Acquired at the same time,  Hillendale ¼, with a “Made In Germany, US Zone” label,  has amazing tone as well!

Never say lastly;  there is always something else.  Steve Fields played the ½.  It’s original bridge, though tweedled with, was still tweedledum.  And the sound post …  So I fiddled with the sound post and recut the existing bridge.  Olivia tried it the following week;  not enough arc on the bridge, and 1.5mm at the G string.  Wow, we’re not doing the Limbo here, Jim.  Too Low!  Back to the shop.

New bridge fit from a blank.  Perfect.  New sound post.  Splintered!  For the 3rd try, I cut and shaped a piece off an old slab of Adirondack spruce.  Finally finished, with a fine-tuner tailpiece as well.  Wait, never say finished …  ∆

Centenarian Violin “Yorke”

This violin was purchased from a gent in York PA in April 2017. He had a long story attached to it which may or may not be true, so I’ll spare you. But it came to me in a paper bag with twine attaching various broken items, bridge, tailpiece, bows, memories. The top has a nice tight grain. Although makers tool marks are evident, especially on the headstock and peg box, the instrument appears to have been made with good materials and assembled very well.

It appeared to have sat for decades unplayed. Gut string ends were still attached to two pegs. Major exterior grime was carefully removed. The top had detatched on both lower sides, as well as a short area of the back. Exactly as one would hope. All were reattached with hot hide glue. I’d like to think you would have a tough time finding my work.

Other than a buffing compound, the varnish received no especial treatment. I specifically did not perform any cosmetic alterations, like touch-ups.

The fingerboard was cleaned, buffed, and sealed with boiled linseed oil.

The instrument received new: tailpiece with E tuner, bridge, D’Addario Kaplan Vivo strings.

The fingerboard and pegs appear original. I’ve seen ebony this color before but am not 100% positive on the wood type.

The instrument appears to have not received repairs of any kind before my actions.

It’s got excellent tone and volume. The pegs grab wonderfully without chalk. IMHO it would play well without the E thumb tuner.

From the dozens of violins that I’ve refurbished over the last few years, I’m guessing this violin was made in the very early 1900s.